
Manage, schedule and monitor your direct ad campaigns
This is the dashboard for managing and monitoring direct campaigns. A direct campaign is one where you have an agreement with a specific advertiser to run a specific advertisement. To allow ad partners to programmatically bid on your available ad inventory, see our help resource on Marketplace.
Campaigns dashboard
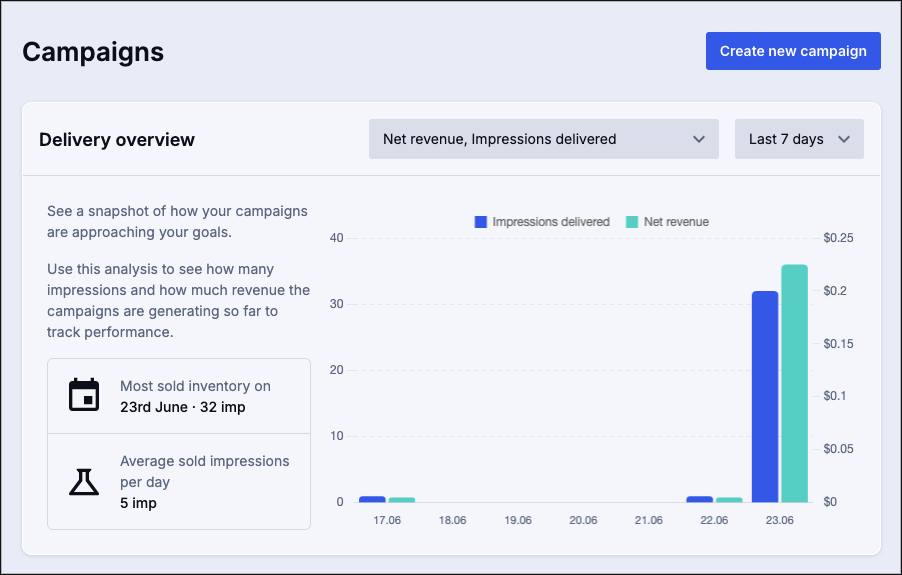
The Campaigns dashboard provides visibility on campaign performance and status. The upper section shows statistics and a graph for at-a-glance reporting.
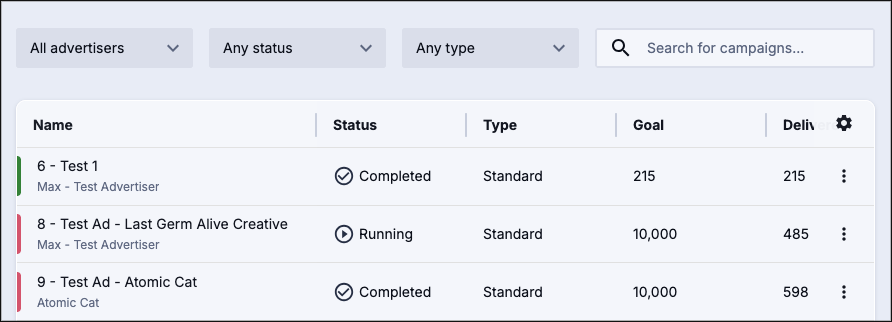
Below the graph is a table that gives you a full view of all your campaigns. You can filter the metrics by:
- Advertiser: Show campaigns from all advertisers or select specific ones from the list
- Status: Show campaigns in any status or select a specific status from the list
- Pending: The campaign has been created but not yet reviewed or approved. It’s waiting for validation before it can run. Not yet cleared to serve ads.
- Approved: The campaign has passed all checks and is authorized to go live. However, it may not be serving yet - it’s simply ready to go.
- Active: The campaign is live and currently serving ads according to its schedule and targeting. This means impressions and revenue can start accruing.
- Paused: The campaign has been temporarily stopped. It will not serve ads until it’s resumed, but all settings and configurations are retained.
- Type: Show campaigns of any type or select a specific type from the list
- Standard: A paid campaign based on an impressions performance goal
- Share of Voice: A paid campaign where you sell a percentage of your total ad inventory
- Promo: A campaign with $0 CPM and a low selection priority
Note: Filters can be used simultaneously, allowing you to view all campaigns of a specific type for a specific advertiser assigned to a selected status. The table displays the following information:
- Name: The name of the campaign, as set when creating the campaign
- Status: The active status of the campaign
- Draft: Campaigns that are currently being edited or created. They will not go live while in this status, even after the campaign start date.
- Scheduled: The campaign has passed all checks and is authorized to go live, but has not reached the scheduled start date.
- Running: The campaign is live and currently serving ads according to its schedule and targeting. This means impressions and revenue can start accruing.
- Completed: This campaign has reached the set end date established when creating the campaign.
- Paused: The campaign has been temporarily stopped. It will not serve ads until it’s resumed, but all settings and configurations are retained.
- Type: What sort of campaign is it
- Standard: A paid campaign based on an impressions performance goal
- Share of Voice: A paid campaign where you sell a percentage of your total ad inventory, instead of a specific number of impressions
- Promo: A campaign with $0 CPM and a low selection priority
- Goal: Your impression goal, as set when creating your campaign
- Delivered: How many impressions were delivered to listeners over the course of a campaign
- Progress: A percentage of the progress toward the set goal
- Performance: How well the campaign is meeting or has met your goals
- In-progress Campaigns:
- On track: Campaign impressions are currently within 5% of your goal or have exceeded your goal
- Off track: Campaign impressions are lower than 5% of your goal
- Completed Campaigns:
- Delivered: Campaign impressions were within 5% of your goal in either direction
- Under delivered: Campaign impressions were 5% or more below your goal
- Over delivered: Campaign impressions were 5% or more above your goal
- In-progress Campaigns:
- Pacing: How often your impressions play throughout the campaign
- Fast: Impressions playing in the first available ad space until the impressions are exhausted, while still adhering to all no compete and no repeat settings for the ad
- Smooth: Impressions are evenly spread across the campaign’s duration
- Revenue: The amount of money the campaign has earned, after fees
- Start Date: The date set for when the campaign starts serving ads
- End Date: The date set for when the campaign stops serving ads
Quick actions
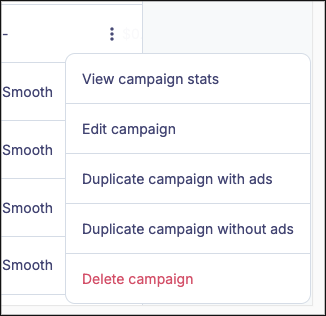
You can interact with your campaigns directly from the dashboard using the quick actions (gear) column. Depending on which columns are visible, you may need to scroll horizontally to see the quick actions. Click the three dots on the line of the campaign you wish to interact with to see the quick actions menu.
- View campaign stats: Go to the Campaign Summary screen to view metrics on your campaign
- Edit campaign: Go to the Campaign Settings screen to modify your campaign
- Duplicate campaign with ads: Create an identical copy of this campaign, including any ads and ad creative associated with the campaign
- Duplicate campaign without ads: Create an identical copy of the campaign settings, but will not create a copy of any ad or ad creative associated with the campaign
- Delete: Remove the campaign from the dashboard, including any ads associated with the campaign
- Deleted campaigns cannot be recovered
Campaign setup
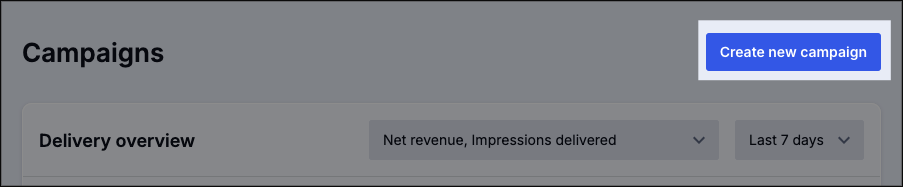
Click the Create new campaign button from the Campaign dashboard to begin Campaign setup.
The Create a new campaign screen provides the following options:
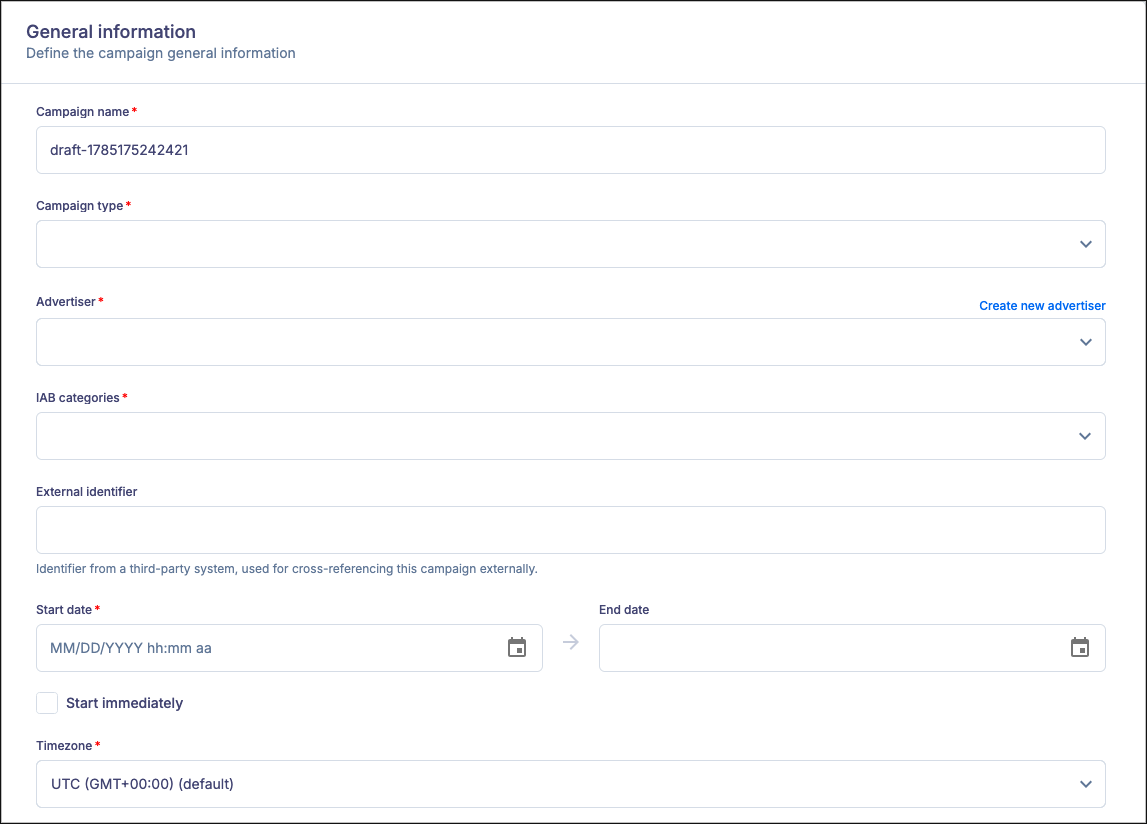
General information
- Campaign name: A unique identifier for your campaign that will appear on dashboards and reports
- For example: 01012026_MCCann_Ford_MachE
Tip: Use a standardized format for all your campaign names, incorporating
useful informational markers such as the campaign start date, agency
name, advertiser name, flight, or product.
- Campaign type:
- Standard: A paid campaign based on an impressions performance goal
- Share of Voice: A paid campaign where you sell a percentage of your total ad inventory, instead of a specific number of impressions
- Promo: A campaign with $0 CPM and a low selection priority
- Advertiser: Select the appropriate Advertiser as defined in the Advertisers section of the Monetize dashboard
- You can create a new advertiser directly from the Create a new campaign screen by clicking the link Create new advertiser

- IAB categories: Automatically populates based on your selection when setting up the advertiser. You can select additional categories if you choose.
- External identifier: An optional field used to cross-reference the campaign with a different system. Key uses for an external ID include third-party reconciliation. If you use an external CRM, billing software, or a separate order management system, you can enter the ID for this campaign from that system here.
- Start date: The date and time the campaign is scheduled to begin. Set your time in HH:MM am/pm format. If you do not enter a time, it will default to midnight in your local time.
- End date: The date the campaign will automatically end. Set your time in HH:MM am/pm format. If you do not enter a time, it will default to midnight in your local time.
- Leave this blank for a campaign that runs continuously
Important: You can only adjust start and end dates for campaigns in the Draft status.
If you need to adjust the start or end date for a campaign that is active, clone the campaign and adjust the start or end date on the new campaign.
- Start immediately: Check this box to set the start date to today’s date.
- Timezone: The timezone to use when determining the campaign start and end time. File a Support Ticket to set your default timezone. This setting automatically applies to your ad daypart targeting settings as well.
Budget
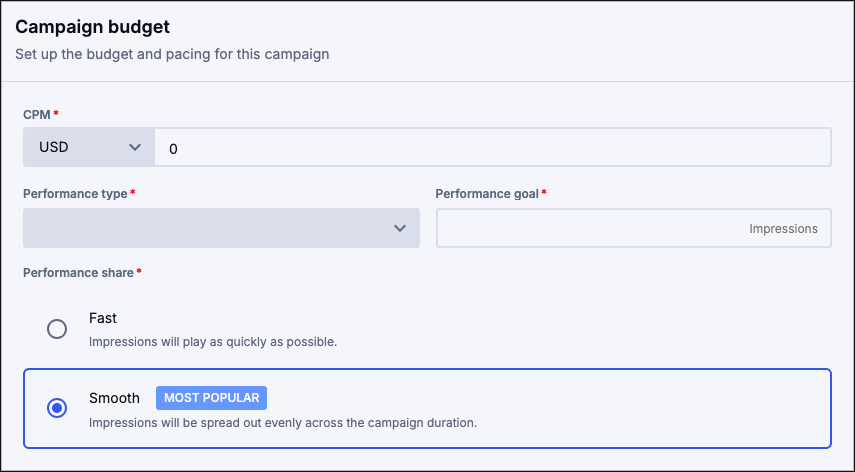
The budget for the campaign is dynamically calculated based on user input in two Budget fields: CPM and Performance goal.
- CPM: The cost per 1,000 impressions that the advertiser will pay you for this campaign
- Because Promo campaigns have a $0 CPM, a CPM value can only be entered for Standard campaigns.
- Performance type: Defaults to Impression
- Performance goal: The number of impressions assigned to this campaign
- Performance share:
- Fast: Impressions will play in the first available ad space until the impressions are exhausted, while still adhering to all no compete and no repeat settings for the ad
- Smooth: Impressions are evenly spread across the campaign’s duration
Zones and zone groups
Zones correlate to the inventory for which the campaign is running, and can easily be selected in the Zone Selector panel. External zones represent zones for which the publisher is a reseller. If you do not resell any inventory, you will not see any external zones, and you will only see internal zones.
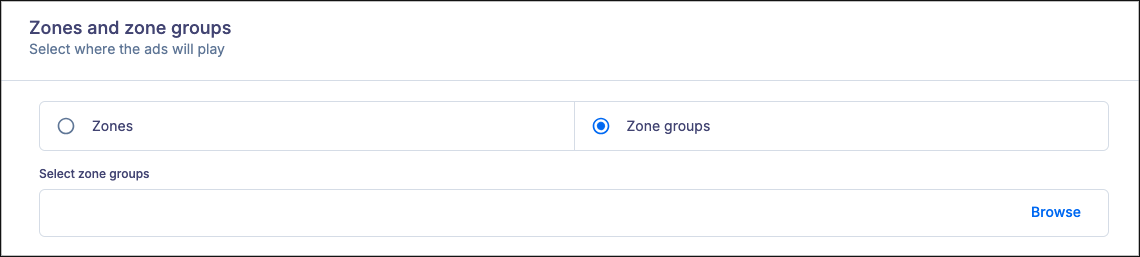
You can select one or more individual zones and/or zone groups.
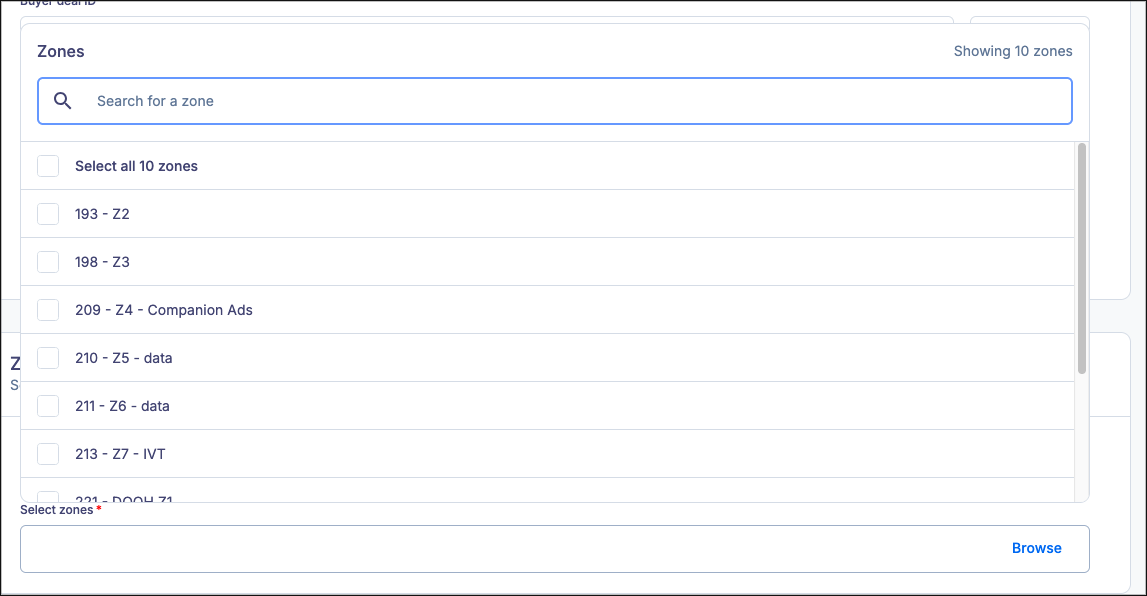
Selecting the Zones radio button and clicking on the Select Zones box will open a menu of all of your zones, which you can select individually or as a group. You can filter for the specific zones you want, but you will still need to click on the check box to add the zone to the campaign.
Selecting the Zone groups radio button and clicking on the Select zone groups box will open a menu of all of your zone groups, which you can select individually or as a group. The menu will show how many zones are in each group and will show the individual zones in the group when clicking on the zone group. You can filter for the specific zone groups you want, but you will still need to click on the check box to add the zone group to the campaign.
Targeting
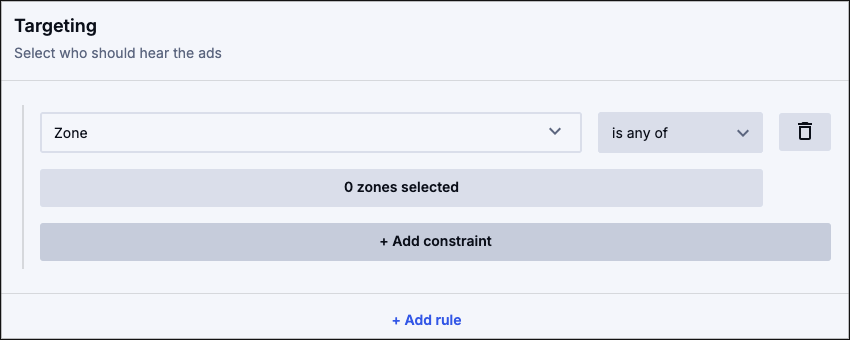
This section allows you to add rules to target specific listeners in your inventory for this campaign. These rules can either include only what is selected (“is any”) or include everything except for what is selected (“is not any”). When you add multiple rules, they are evaluated on an “or” method, meaning if any of the rules match, the inventory will be used.
| Content country |
| Custom Key-Value Pair |
Click Add constraint to combine two or more targeting categories to create a rule where the campaign will only be available to listeners when all rules are matched.
Click Add rule to create additional rules where the campaign will be available to listeners who match any of the selected rules.
For example:
- If you wanted to target only listeners who live in the United States of America who use a specific web browser, you would Add constraint to create two rules joined by AND.
- If you wanted to target all listeners who live in the United States of America or who use a specific web browser (the ad would target all listeners in the United States of America regardless of browser and all listeners using the specific browser regardless of where they live) you would Add rule to create two rules joined by OR.
Frequency capping
Frequency capping is optional and restricts how often a unique user hears the specific campaign, regardless of which zone they are currently listening to. In the example screenshot, no individual listener will hear the campaign more than once in a 10 minute period. Frequency capping in Monetize is at the campaign level and applies to selected inventory zones. You are able to add multiple frequency caps to a campaign in order to define multiple rules. For example, if you wanted to restrict the campaign to only play once per hour and no more than 10 times in a 24-hour period, you would create two frequency caps.
- Max impressions per unique listener: The maximum number of times an individual listener can hear the specific campaign during the specified time
- every: Used in conjunction with the pull-down menu to define how often the campaign can play over the time period you specify
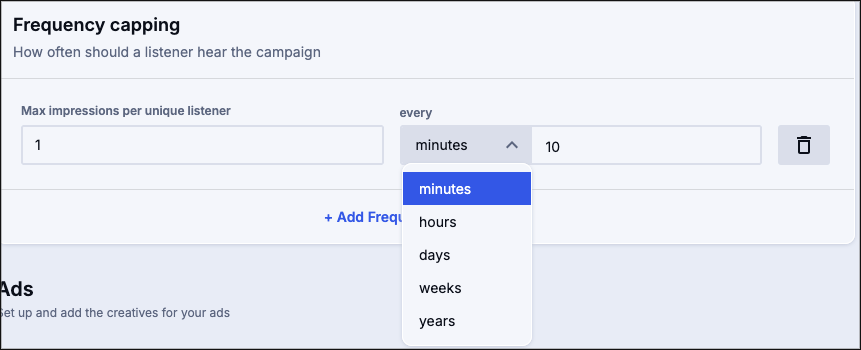
You can add additional frequency capping rules by clicking Add Frequency capping rule, and delete unwanted rules by clicking the trash can next to the rule.
Ads
After having at least a campaign type, a start date, and an end date for the campaign, you can add one or more ads to your campaign by clicking the Add an ad to this campaign link.
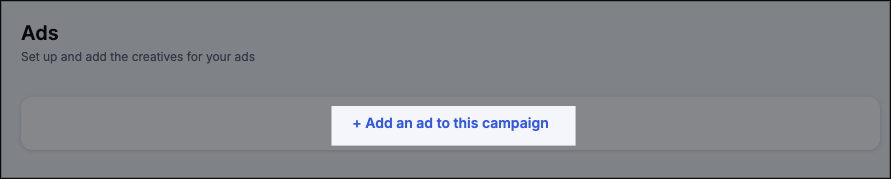
Once you create the ad, click the arrow to configure it.

- Name: The name of the ad, as it will appear in the campaign view
- Goal: Set how impressions will be distributed across the campaign, especially when there is more than one ad in the campaign:
- Auto-balance: Evenly distribute impressions across all ads in the campaign.
- If there is only one ad in the campaign, this will automatically be 100% of impressions
- If there is more than one ad in the campaign and one or more other ads are set to Custom, an ad set to Auto will distribute impressions across whatever inventory is left after the custom rules are applied
- Custom: Set the specific impression and priority goal for this ad
- Performance goal: The goal of impressions you want for this specific ad
- Auto-balance: Evenly distribute impressions across all ads in the campaign.

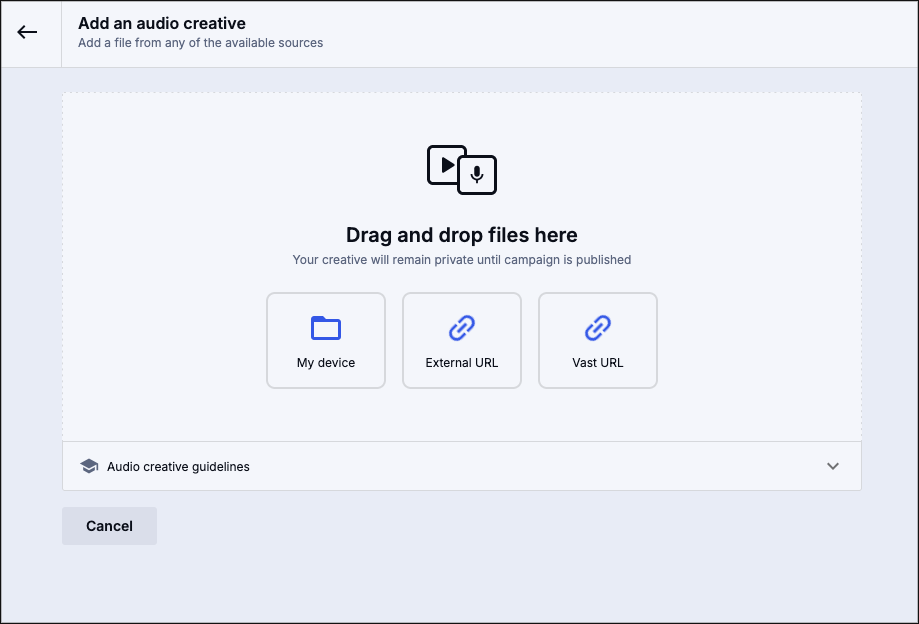
- Add an audio creative: Click the Add audio file button to upload your creative. You can either click to select a file or drag and drop it into the box.
Audio ads should be between 15 and 60 seconds long. Ensure audio quality is at least 128kbps and include a clear call-to-action. Avoid abrupt starts and endings — use fade-in and fade-out where appropriate.
Note: WAV files typically have a higher bitrate, often around 1,411 kbps, which can cause issues despite being a supported format.
Restrictions:
- 10 MB maximum file size
- Use following ad file formats: MP3, AAC, Ogg, and WAV.
- Bit rate between 8 kbps and 320 kbps
- Ads should be Transcoded to the publisher’s encoding settings.
- Add a companion banner: A companion banner is an image specific to the ad creative that will automatically appear around compatible web players when the ad is served to listeners. This banner can link listeners to additional content about the ad via a URL embedded in the banner, allowing listeners an opportunity to further interact with the ad.
Companion banners should be visually appealing and relevant to the audio
content. Ensure images are high quality and include a clear call-to-action. Avoid cluttered designs and maintain a consistent style with your brand.
- Targeting: Specifies campaign or custom targeting. Targeting set on the ad screen overrides campaign-level targeting.
Click the Custom ad settings button to open the custom settings side bar, where you can set additional aspects of the ad.
- Performance buffer: Increase the impression you want to receive above the performance goal for this specific ad. The feature allows the campaign to exceed your performance goal to ensure that an ad meets your agreement with the advertiser in situations where there may be a discrepancy between the actual number of impressions and the number of impressions reported to the advertiser. This may happen in campaigns that are using external tracking pixels. It should not be necessary to use this feature in most ads. The performance buffer is not billed up front.
Available for custom goals
- Priority: How you want this ad to receive impressions, relative to other ads in this campaign and in all other active campaigns in your account. If you have two ads with the same priority, and all other selection rules are equal, the ad to be served will be selected at random.
- A value of 1 is the highest priority, and a value of 16 is the lowest priority
- Available for custom goals
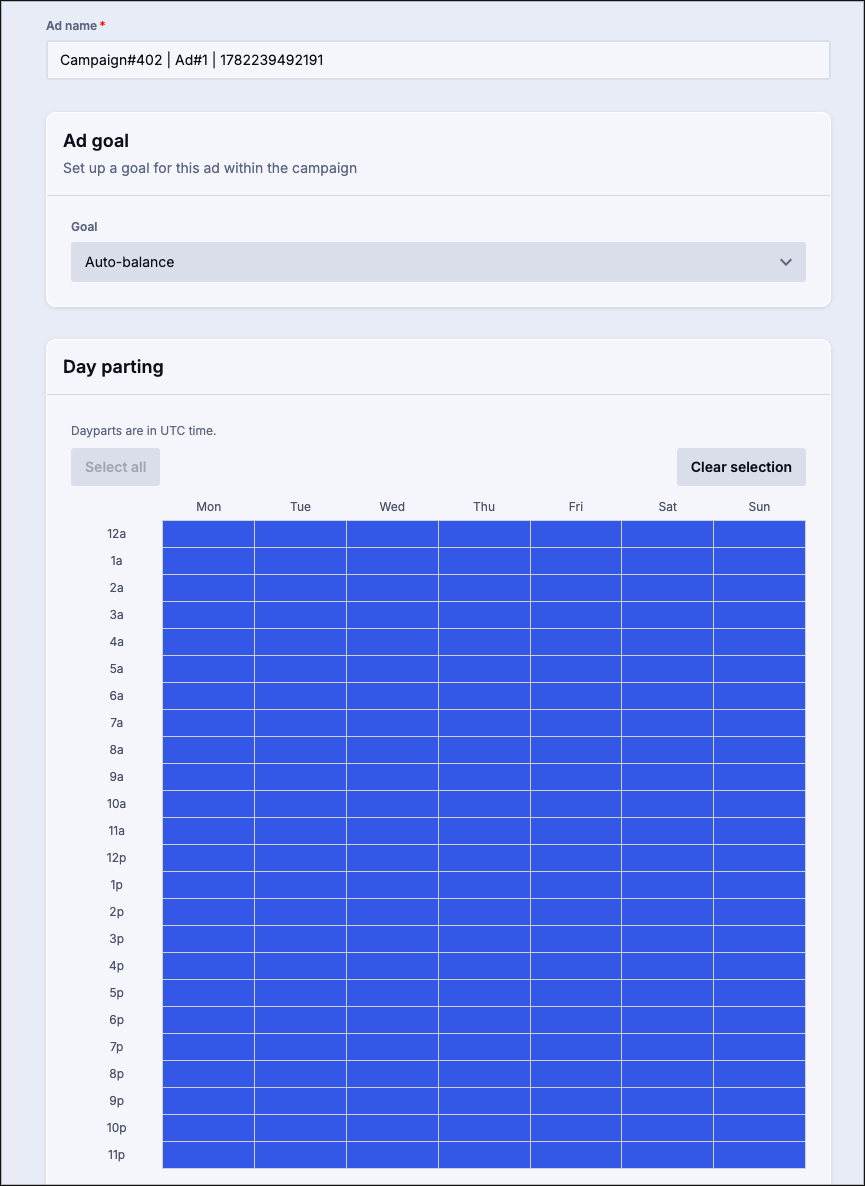
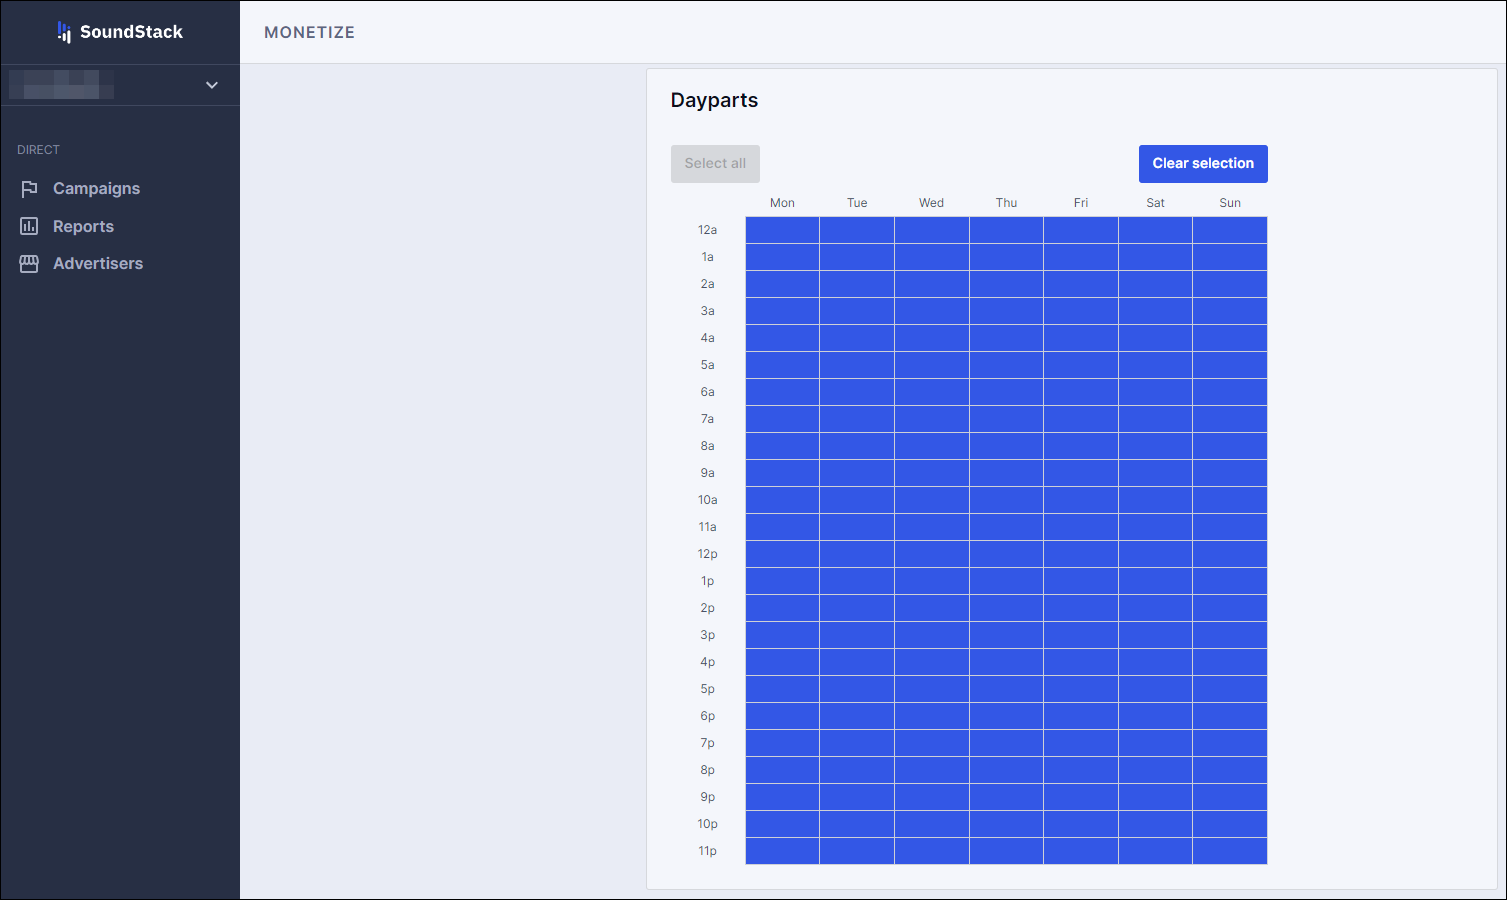
- Day parting: Schedule the ad to run for certain times of day, or certain days of the week, in order to more effectively target audiences
- Select dayparts by clicking the desired date and day of the week
- Blue cells are the times and days when the ad is able to play
- Select all will highlight all cells blue
- Clear selection will turn all cells white
Advanced settings
You can set attributes for the ad that will override the campaign settings, including:
- Schedule
Important: You cannot set the ad's schedule to before the campaign begins or after the campaign ends
- Frequency capping
- Zones
- Define inventory
External tracking URL
You can configure external tracking in the Advanced Settings Ad screen. External tracking in Monetize allows you to add third-party tracking URLs to your ads for measurement and analytics purposes. The external tracking functionality works through server-side ad insertion, where third-party partners like Podtrac provide tracking URLs that can include macros for dynamic data insertion. When an impression triggers, DAS (Dynamic Audio Server) calls the tracking URL with all the macros filled in with relevant data. The system supports a subset of macros that are currently available in Monetize. Each click of the Add another URL button will allow you to add a separate External URL to the campaign.

Multi-ad Campaigns
You can run a single campaign with several creatives, allowing you to track the performance of the ads separately and rolled up together as a full campaign.
Click Add another ad line to this campaign to create an additional ad for this campaign. Each ad can have one creative.
Once you have added at least one more ad, you can manage each ad separately. Some aspects of each ad can inherit attributes of the campaign, while others are custom for each ad.
- Name: Custom for each ad
- Advertiser: Always inherited
- IAB category: Always inherited
- External identifier: Always inherited
- Campaign type: Always inherited
- CPM: Always inherited
- CPM currency: Always inherited
- Performance type: Always inherited
- Performance goal: Inherited by default, but can be customized
- Performance pacing: Inherited by default, but can be customized
- Goal: Custom for each ad
- Dayparts: Custom for each ad
- Creative: Custom for each ad
- Schedule: Inherited by default, but can be customized
- Frequency capping: Custom for each ad
- Zones: Inherited by default, but can be customized
- Define inventory: Inherited by default, but can be customized
- External Tracking: Custom for each ad
Next Steps
Once your campaign and ads are running, you can view details of their performance, run reports, create a copy of a campaign, and edit settings.
Campaign Summary
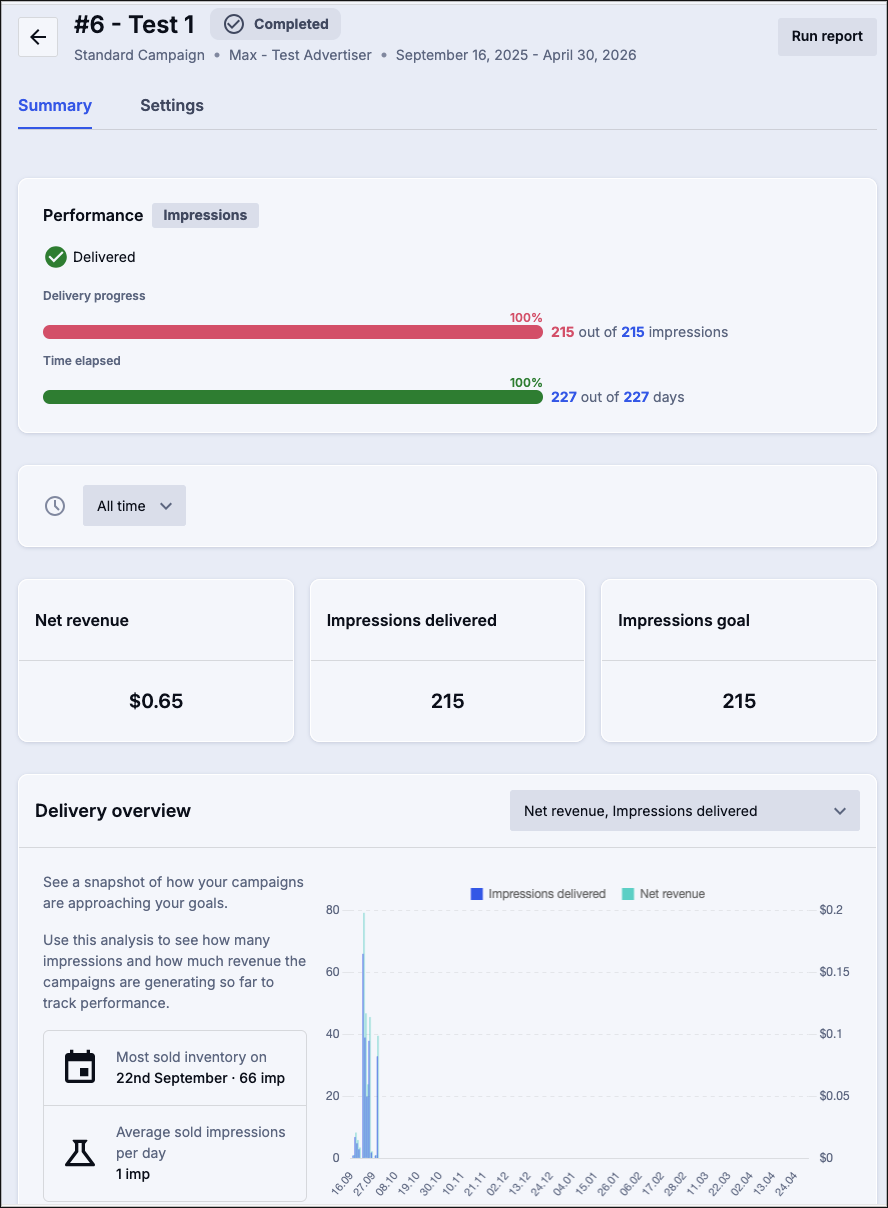
To view additional details about a campaign’s performance, click the campaign’s row on the Campaign dashboard.
Here, you can see the following information about your campaign
- Name
- Status
- Advertiser
- Start and end date
- Net revenue
- Performance
- Performance status
- Delivery progress: The percentage of the impression goal achieved, along with the number of impressions and the total goal
- Time elapsed: The percentage of the total number of days elapsed in your campaign, along with the number of elapsed days and the total number of days in your campaign
You can also interact with your campaign:
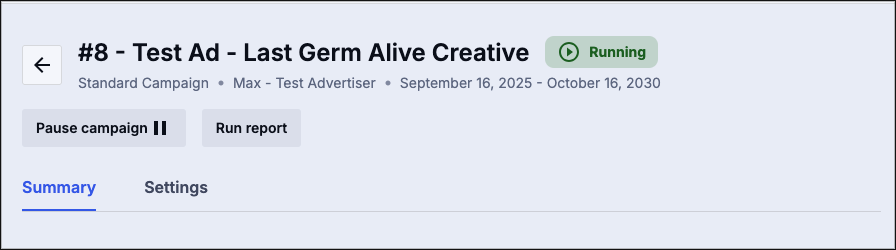
- Pause campaign: Move an active campaign to a paused state, where no ads are served, but all settings are retained
- Run report: Click this button to go to the Reports screen for this campaign
Settings
Here, you can edit some aspects of a campaign that has not yet started, or one that is in progress. Depending on the campaign’s status, some aspects of the campaign may not be able to be edited. If a field is greyed out, that means it cannot be edited in the campaign’s current state.
Cloning Campaigns
You can make a direct copy of a campaign, with or without the associated ads, by cloning the campaign.
To clone a campaign, click the Quick Action button for the campaign you wish to duplicate.
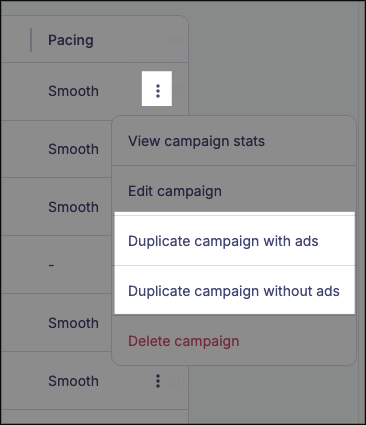
If you want to make a copy of the campaign with all of the ads and ad creatives, select Duplicate campaign with ads. This is useful when you want to run the exact same campaign again, with all of the same ads.
If you want to make a copy of a campaign but create completely new ads, select Duplicate campaign without ads. This is useful when you want to preserve the targeting, timing and budget of a prior campaign but wish to use brand new ads.
Note: The start and end dates of the campaign and ads will also be copied. Ensure you update the date intervals for both the ads and the campaigns before you publish your campaign.
Editing Campaigns
Once you have added your ad information, you can edit the individual ad or ads by clicking Edit to access the Edit Ad screen, where all other ad settings can be viewed and modified.
If you have any further questions or concerns please do not hesitate to contact our Support Team through the ticket submission form or by emailing us at support@soundstack.com.